My Disney Experience - The Most Magical App
- MagicBound

- May 10, 2024
- 5 min read
Updated: Nov 27, 2024
The My Disney Experience app: Magic in the Palm of Your Hand
Before heading to any Disney Park, make sure you download the My Disney Experience app for your iPhone or Android, free from your app store. This app will be an important asset for planning your day, reserving meals and magical extras, and navigating the parks and attractions. Here is a step by step guide for getting you ready to plan your best day!

A Step-By-Step Guide to Using Your My Disney Experience App
When I first started visiting the Disney Parks, I had no ideas what I was doing. I did not know that you even needed an app to visit a theme park! Thankfully, the My Disney Experience app has grown in to a sophisticated, seamless assistant to help you plan your parks days, so you don't end up wasting time and money trying to figure out what to do with your day.
Based on my own trial and error (headaches and frustrations!) I have built a step-by-step guide from first login to making reservation to modifying plans for you to follow. Your user name and password for this app holds all of your reservations, Enchanting Extras, and even your runDisney events inside - happy planning and let's get into it!
Step-By-Step in the My Disney Experience App
1. Download the My Disney Experience App
Visit the App Store (for iOS devices) or Google Play Store (for Android devices).
Search for "My Disney Experience" and download the app. It’s a free app with no in-app purchases, unless of course you’re choosing to make a purchase at the parks, and you link a payment method to your profile.

2. Create an Account
Open the app and create a Disney account if you don't have one. If you already have an account, log in.

3. Link Reservations
Link your hotel reservation, park tickets, and any other reservations or purchases made through Disney to your account. This allows you to manage all aspects of your visit in one place.

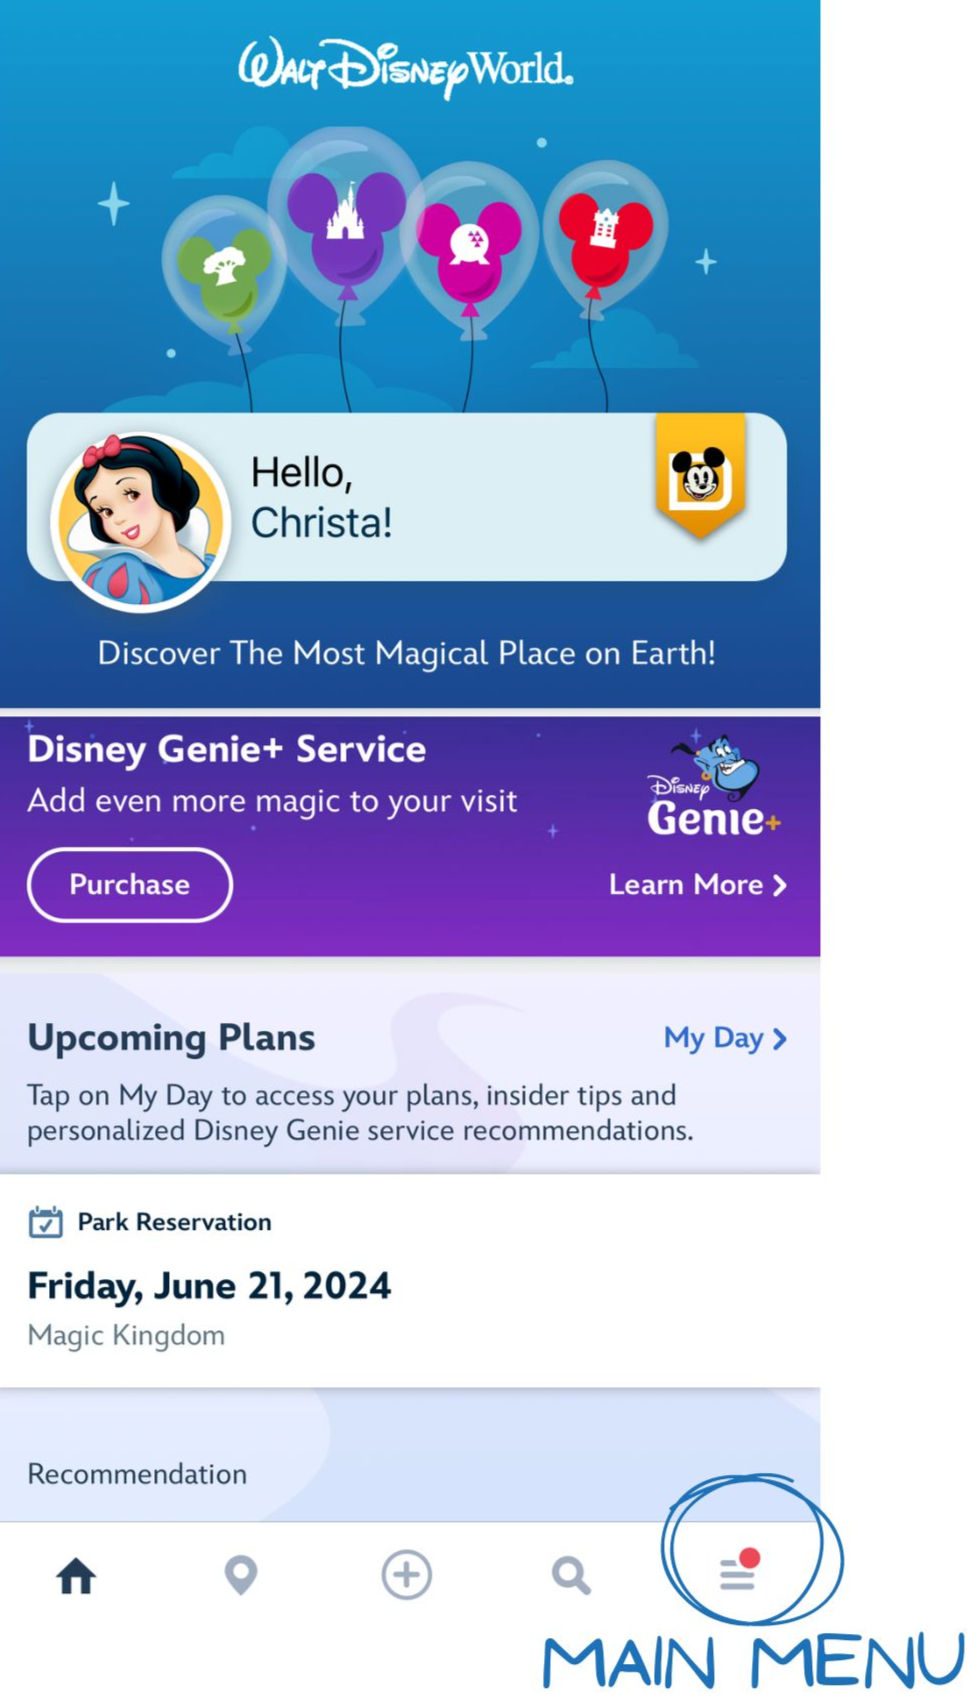
To link reservations, tap on the three lines (aka hamburger icon) in the lower right corner of the app screen.
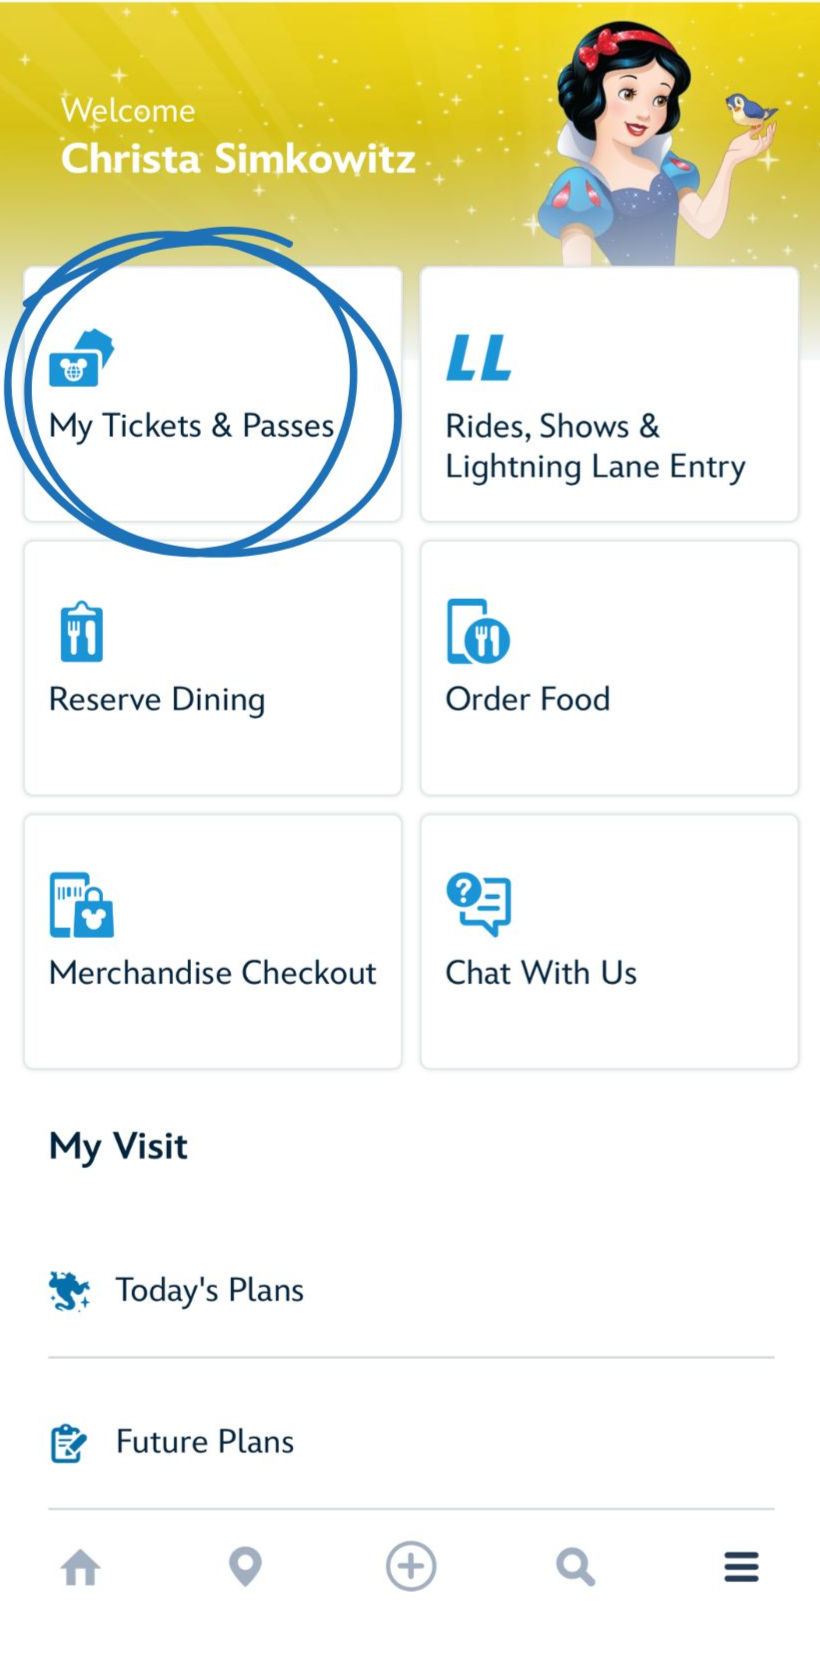
Tap on the “My Tickets & Passes” tile. This will always be the screen you see when you click the main menu hamburger tile - it's the one we're on the most as it's the hub of planning our trip!

Select “Link tickets and passes”, or if that is not visible, select the "+" icon on the upper right corner of the app, and the menu will drop down.

You can scan the barcodes from printed tickets, tap to a MagicBand, or type in the ID Number of your tickets, or link a Resort reservation or dining reservation.
**Please note that purchasing park tickets no longer requires a reservation, whereas Annual Passes do in most cases, so this may affect how information is displayed in the "Future Plans” section of MDE.
4. Add Friends and Family
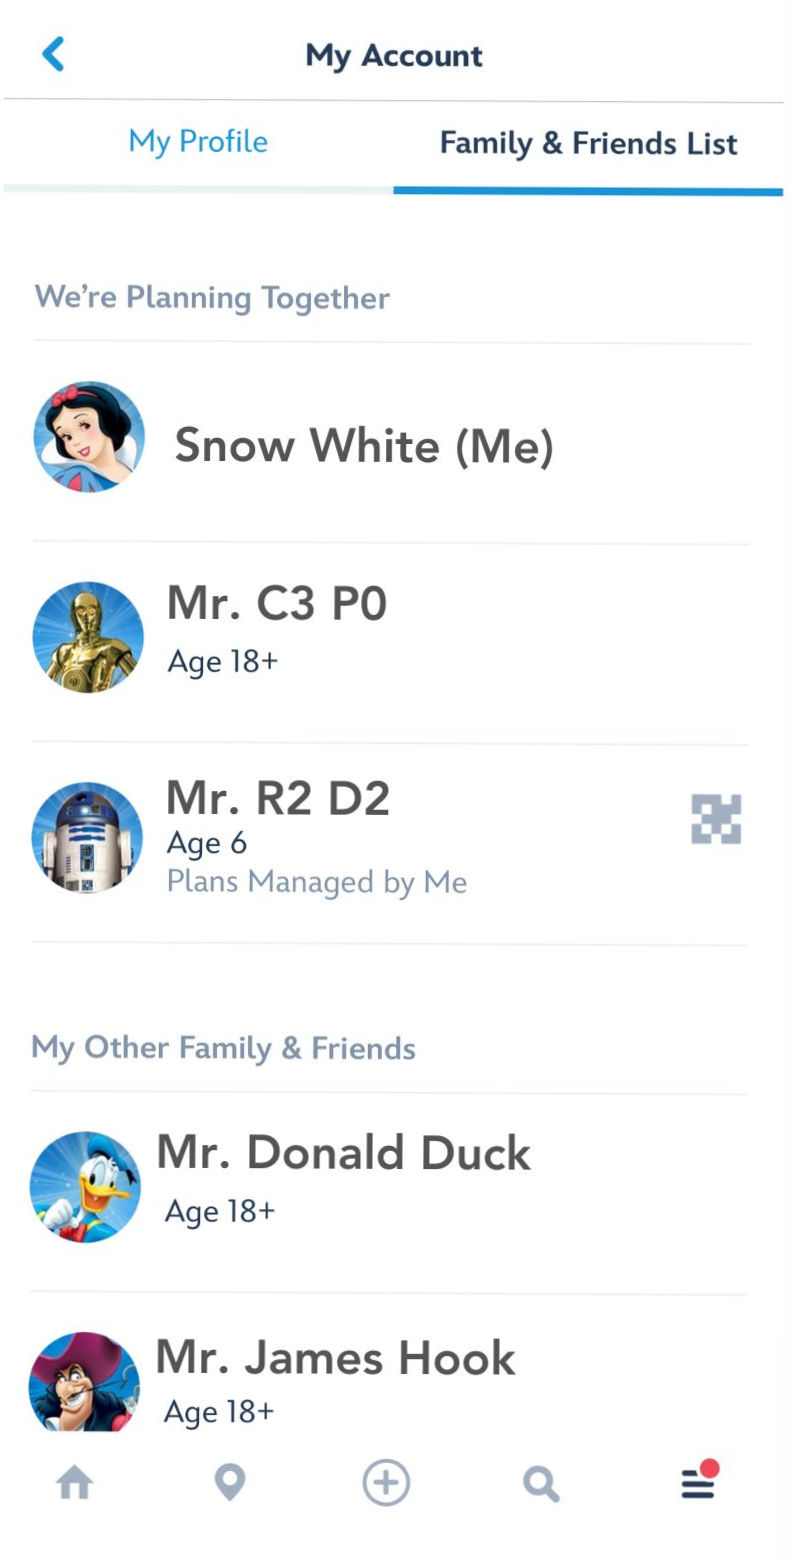
Add friends and family to your plans by scrolling down to “My profile”
Select “Family & Friends List”
Scroll down to “Add a Guest”

Choose to find a guest through your current connected guests, by entering their name and age, or by scanning their linking code (linking codes live at the bottom of your main profile page).
Once added, they will appear in your friends and family list so you can make plans with them, including Genie Plus purchases, Lightning Lane selections, Magical Extras, Dining reservations, and more.
5. Customize your day
Plan your visit by selecting Genie Plus attractions, dining reservations, and other experiences. You can customize your itinerary and make changes as needed.
6. Access Park Maps
Use the app to access interactive maps of the Disney parks. This can help you navigate through the parks, locate attractions, dining options, and other points of interest.
Tap location icon on the bottom of your MDE app, and then tap the drop down carrot next to “Wait Times” to select park features such as restroom locations, character greeting locations, PhotoPass spots, and more.
7. Check Wait Times
The app provides real-time information on wait times for attractions. This can help you plan your day and choose which attractions to visit.
To view wait times, tap the location icon on the bottom of your MDE app. It will automatically show the full park with wait times hovering over the attractions.
To filter, click “Filter” in the upper left corner and make your selection and Apply; you can also tap “Show List” to show you a list of attraction wait times, rather than an interactive map, which I personally prefer!
8. Dining Options
Some dining locations offer mobile ordering through the app. You can place your order and pay in advance, reducing the time you spend waiting in line. You can select the time window that will work best for you, and you can also change your arrival time if your plans change- ride breakdowns and delays always throw a wrench in your plans! Thankfully MDE is flexible to fit your changing needs throughout the day.
Tap the "+" icon on the bottom of your MDE app, and select "Check Dining Availability" to search for available table service restaurant windows (this can be selected up to 60 days prior to your visit). This is for sit-down restaurants only.
Select "Order Food" for mobile order availability. This is for Quick-Service restaurants at the parks only, but it is also available at select Resorts restaurants for take-out (select menus apply).
9. Virtual Queue
Depending on the park and the availability, you may use the app to join virtual queues for certain attractions, like Star Wars: Rise of the Resistance in Disney's Hollywood Studios. Think of it like a boarding pass with a dedicated return time window. If your virtual queue is called at 11:00am, for example, you will have a 60 minute window to check in for the ride, beginning at the time of your virtual queue starting time.
10. PhotoPass
Link your PhotoPass to the app to view and download your Disney PhotoPass pictures. PhotoPass includes photos from rides (ghosts in your Doom Buggy, anyone?) and professional photography from around the parks. They will show up shortly after scanning your Magic Band or Magic Band+ in the "Photos" section of your MDE app.
You can either choose to purchase a PhotoPass add-on to your Annual Pass or tickets, or if you choose to purchase Genie Plus for the day, PhotoPass is complimentary on that day. Don’t want to do either? The photos will still show up in your Photos tile on MDE - with a watermark across them, but that never stopped me from grabbing a screenshot and posting to social media!
11. Updates and Notifications
Enable push notifications to receive important updates, such as changes in attraction availability, showtimes, or any other relevant information.
So you see, once your account it set up and ready to go, the My Disney Experience app is where you can plan your and your friends & family's future plans, make reservations, plan for the experiences you want to enjoy, and also make any changes you need as your day progresses. Very few things these days require a phone call or chat session with guest services (although some things still do- for example, if you want to make a payment toward a hotel room reservation, you will still need to call the Disney support line for assistance).
In no time you will be a My Disney Experience master!


Comments